The Finishing Touch
Curious about varnishing?
You may wonder if it is really necessary or how best to apply it. In this post I explain why I choose to varnish my oil paintings, varnishing benefits, and some best practices for application.
Oil paintings can last for many lifetimes when housed under the right conditions; visit any art museum and you will find beautiful testaments to the medium’s longevity.
So is varnishing really necessary? Under optimal conditions, paintings don’t technically require varnish to last longer, but application is fast and the benefits of varnishing include:
protection from dust, dirt, moisture, smoke, and UV rays
peace of mind when cleaning, and ease of future restoration
increased color vibrancy (gloss) or softening (matte)
Since oil paintings are quite durable, finished works are often displayed in frames without glass. While this eliminates the distraction of glare, it leaves the artwork surface vulnerable to particles in the air. Like all exposed surfaces in a home, oil paintings will accumulate dust over time. Occasionally they will need a light cleaning to keep colors vibrant and prevent the build up of grime on the surface.
When an oil painting is dry you can lightly dust it every few weeks with a microfiber towel. For a deeper cleaning, gently wipe down the surface with a microfiber cloth damp with warm water and dab more delicate areas using q-tips. If the painting’s surface is still grimey, add a small amount of dish soap to your warm water and repeat.
If the surface does not improve at this point, your best hope is that only the varnish coat needs restoration. The varnish coat can be carefully removed with solvents, then a fresh coat can be reapplied.
However, without a varnish layer, the top layer of paint may be damaged. In this scenario restoration will be much more delicate, intensive, and potentially costly.
Varnishing a painting’s surface adds a buffer between pigments and the environment.
I add this layer of protection to all my paintings so they are easy to clean and my collectors have peace of mind when caring for my artwork in their homes.
So What Do I Need to Start Varnishing My Paintings?
First, decide what varnish is right for your style and finish preference as well as where your work will live.
Many varnishes are non-yellowing, acid-free, and can be carefully removed with solvents in case paintings need a touch up or the varnish needs to be cleaned. UV protective varnishes are important for artwork that is displayed out in the sun- I don’t find this necessary for my work, but if you plan on working on an outdoor mural, this is a layer of varnish to consider.
As varnishes vary widely from one brand to the next, always follow the manufacturer’s instructions for specifics on safe application and removal.
Varnish comes in liquid or spray form and is usually a resin or acrylic polymer based. Generally sprays are used for more delicate surfaces, but a dry oil painting can withstand spray and light brushing with no issues. It is easier to get a more uniform application with a spray, but sprays will not easily reach into smaller paint crevices like a brush-on formula.
Gloss, satin, and matte finishes are available to accommodate your personal preference- the glossiest varnish will deepen your colors, while matte varnish adds a softening effect, and satin is the most neutral of the finishes. Because I like to paint with Gamblin oils, I use the brush-on varnish, Gamvar Gloss by Gamblin. I love a more saturated look, so gloss is my go-to finish.
Here you can compare the area with varnish to dry spots- the varnish helps deepen colors that otherwise look slightly chalky.
For liquid formulas you will want to use a wide synthetic brush. I recommend getting something cheap enough that it isn’t precious, yet still well constructed so the bristles don’t break off and stick to your painting. I have one brush dedicated just to varnishing, as varnish dries quickly and you don’t want to ruin a nicer painting brush.
Always varnish and dry your painting in a well-ventilated and dust-free room. Varnish on a flat surface covered in a few layers of newspaper.
Brush-On Varnish Application
Wait until the thickest parts of your painting are thoroughly dry before applying varnish. Some artists recommend waiting at least six months to ensure the paint is fully cured. If your painting is not fully dry, applying varnish can cause streaking; or worse, it can seal moisture within the paint layers, leading to clouding, discoloration, and even mold.
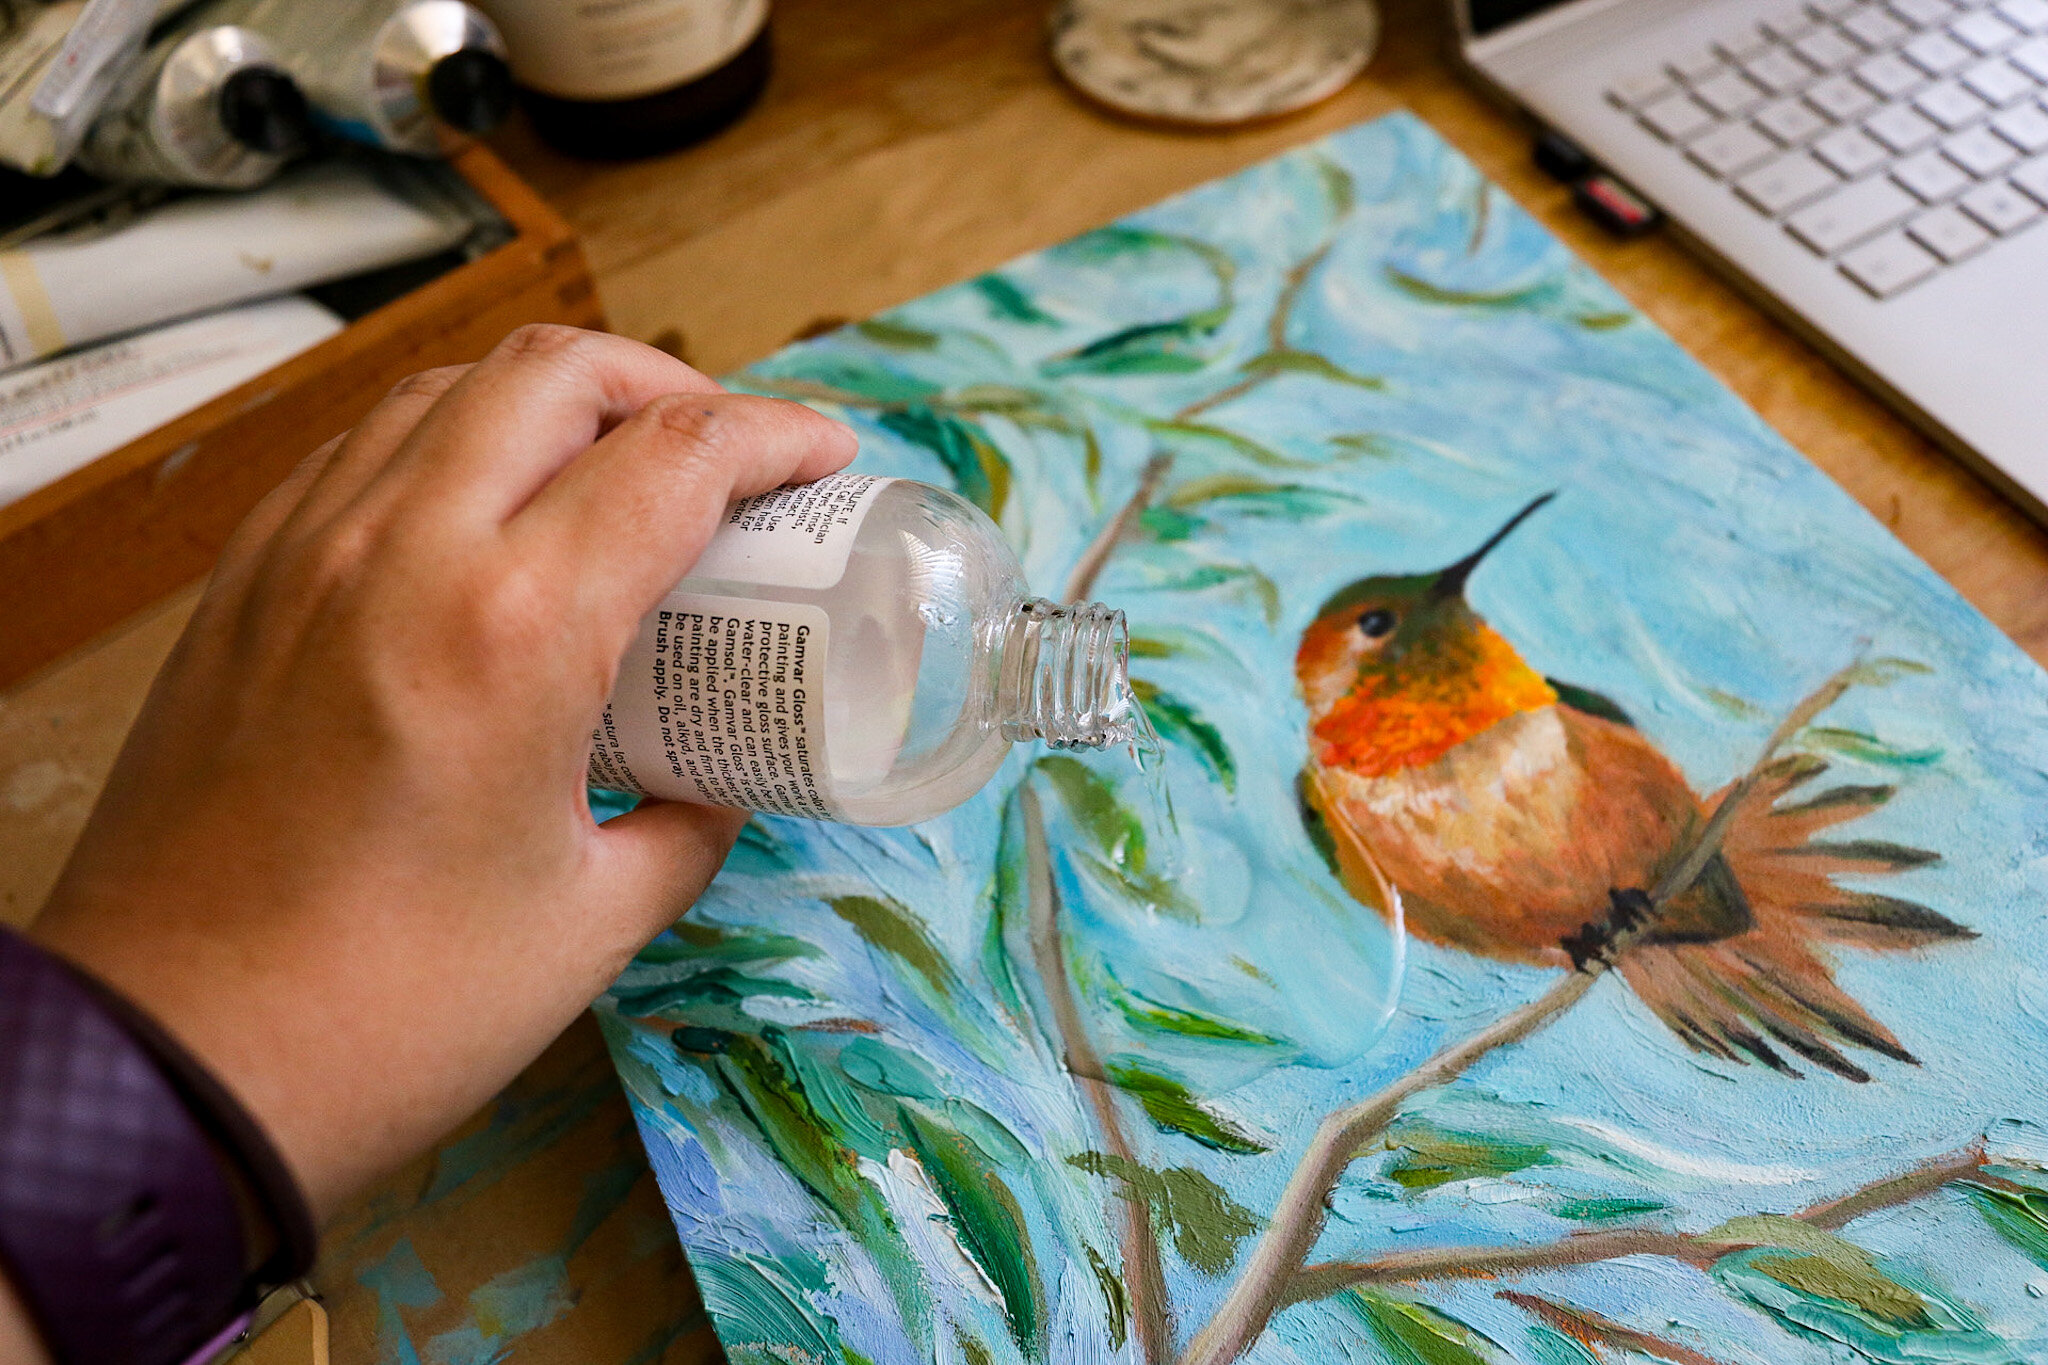
Before applying varnish, carefully wipe down your painting’s surface. Pour a small amount (start with a tablespoon for a 9”x12” painting) onto the center of your painting surface and brush outwards. Spread the varnish, evenly covering the surface. Pour just a little at a time, and continue until your painting is evenly covered.
Your painting should appear just wet, not overly saturated with varnish. If your varnish pools in areas, try to sweep the excess off the painting surface, catching it at the edge with a paper towel. Some artists who paint with thick impasto layers use spray varnish because brushing can cause bubbles, but I just avoid bubbles by spreading the formula slowly and carefully.
Once covered, carefully scan the surface, picking out any stray fibers or dust with tweezers.
Lay your painting down to dry for at least 24 hours before touching the surface. You can clean your varnish brush with mineral spirits, then washing it with soap and water and laying it out to dry overnight.
If you have any varnishing tips or experience to share, feel free to comment below!


